How to install cork flooring
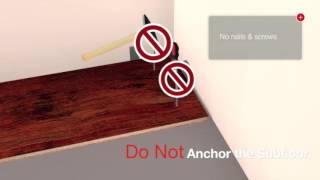
How to install cork flooring Acclimate the Flooring Prior to installing cork flooring, you must allow the cork floor to sit in the space for 72 hours. Indoor living temperatures must be maintained before during and after installation between 15 and 24 Celsius (or 58 to 75 Fahrenheit). Consistent indoor Relative Humidity must be maintained between 45 and 65 %. Vapour Barrier 6mil polyethylene sheeting is used over concrete subfloors. The seams are overlapped by 6 to 8 inches and taped closed using moisture resistant tape. Assessing Floor Level Using a 4ft or 10ft straight edge, assess the level of flatness in the subfloor. Cork floating floors require a flatness quotient of 3mm over 3 meters or 1/8 inch over 10 ft. Glueless Install cork flooring Forna cork flooring utilizes the Uniclic profile. It does not require the use of adhesives, nails or screws during the laying process. Baseboards Added After Cork Floor Installation Ideally the baseboards and trim are added after the cork floor has been installed. Quarter Round or Shoe Moulding Added to Baseboards If baseboards are left in place, quarter round or shoe moldings can be added afterwards to cover the ½ inch expansion gap. Orienting First Plank of cork flooring 12mm or 1/2 Inch spacers are used at all walls and out croppings to ensure the proper expansion gap is maintained. The tongue of the cork plank are presented facing the wall. The tongue is to be trimmed from the first row of planks. The groove is left exposed or facing out into the room. Do NOT Anchor to Subfloor Under no circumstances should the cork floor be nailed, screwed, stapled or glued to the subfloor. It cannot be anchored by cabinets or door jams. It must be allowed to expand and contract freely without hindrance. Aligning the First Row Take care to align the first row of cork planks with each other. Keep the edges straight and parallel with the edge of the previous cork plank. The Uniclic system requires each cork plank to be angled into place and gently tapped to engage the lock system. Without the gentle tapping on each edge, you run the risk of the seams coming apart. A seam that is visible is a seam that To measure the last cork plank in the row you turn it over so it is sitting next to the installed row. Tongue touching the spacer at the wall. Mark off the length of the board with your straight edge. Make sure you measure from the “finished” surface of the plank, not the groove. The last plank must be a minimum of 4 inches long. If it is not, the first plank must be trimmed to allow for the proper length. The pull bar is used to install the last row. Install Second Row of cork flooring Use the remaining length of plank trimmed from the previous row to start the next row. Measure to ensure the length is greater than 4 inches in length. If it is not, begin the row with a ½ plank – making sure the seam of the first row are off-set by 2-3 inches. “H” joints are to be avoided. Angle the cut cork flo
 HD
HD
 HD
HD HD
HD HD
HD HD
HD HD
HD HD
HD HD
HD HD
HD HD
HD HD
HD HD
HD