iPhone 7 Plus Battery Repair Guide - Fixez.com HD
iPhone 7 Plus Replacement Battery: http://bit.ly/2lgMQgU iPhone 7 Plus Repair Tools: http://bit.ly/2lrJZ8x https://www.fixez.com presents the official iPhone 7 Plus Battery Repair and Replacement Guide. Following the step-by-step, detailed instructions we have provided will help you safely replace an iPhone 7 Plus battery that is damaged or not holding a charge. Visit Fixez.com for all of the DIY iPhone 7 Plus replacement screens, parts and tools you need to fix your cell phone quickly, and affordably. Subscribe to our YouTube Channel for additional DIY smartphone and tablet teardown and repair videos! https://www.youtube.com/channel/UCDJrZCUtdJQaJq0akRCt3Ng Like us on Facebook: https://www.facebook.com/fixez.com Follow us on Twitter: https://twitter.com/fixezdotcom iPhone 7 Plus Battery Repair Guide Video steps: Step 1 Power down your Apple iPhone 7 Plus smartphone. Step 2 Eject the Nano-SIM Card Tray. Step 3 (iPhone 7 Plus Display Assembly) Remove the two bottom 3.4 mm Pentalobe screws located next to the lightning connector. Step 4 Use the precision knife to create enough space to insert a triangle opening tool. With the opening tool slice through the intense adhesive and help carefully decouple the iPhone 7 Plus display assembly from the rear case. Unlike previous iPhone models the 7 Plus bizarrely opens to the side. The display assembly is still connected to the iPhone by cables along the middle-right side, so don’t try to remove it entirely just yet. Remove the following 4 Tri-Point screws securing the bracket that covers the battery connector and two of the display cables. These screws are different sizes, so be sure to remember where they go. With the bracket out of the way spudge up the cables from the logic board. Remove the following 3 Tri-Point screws that secure the bracket covering the upper component display cable. Disconnect the cable and free the iPhone 7 Plus display assembly from the phone. Step 5 (iPhone 7 Plus Taptic Engine) In place of the headphone jack is a barometric vent. Remove the following 2 Phillips screws and then raise it out of the iPhone 7 Plus rear case. Remove the following 3 Phillips screws. Detach and free the iPhone 7 Plus Taptic Engine. This sleek engine uses haptic feedback to simulate the push of a button. Step 6 (iPhone 7 Plus Battery) Locate the three peel-to-remove adhesive tabs at the bottom of the 7 Plus battery. Grab the first tab and try to keep the adhesive strip flat and wide. Slowly and gently pull each strip up and away from the iPhone 7 Plus. The strips will stretch to many times the length of the battery- keep pulling until they come out from between the battery and the rear case. And just like that, out pops the 2900 milliampere-hour (mAh) iPhone 7 Plus battery. * To reassemble your device, follow the steps in reverse order
Похожие видео
 HD
HD HD
HD HD
HD HD
HD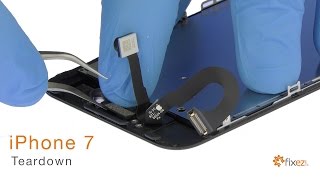 HD
HD HD
HD HD
HD HD
HD HD
HD HD
HD HD
HD
 HD
HD HD
HD HD
HD HD
HD HD
HD HD
HD HD
HD HD
HD HD
HD HD
HD HD
HD HD
HD HD
HD HD
HD HD
HD HD
HD HD
HD HD
HD HD
HD HD
HDПоказать еще