Part 18 Load xml data into sql server table using sqlbulkcopy HD
In this video we will discuss 1. What is the use of SqlBulkCopy class 2. Loading xml data into sql server table using sqlbulkcopy What is the use of SqlBulkCopy class SqlBulkCopy class is used to bulk copy data from different data sources to SQL Server database. This class is present in System.Data.SqlClient namespace. This class can be used to write data only to SQL Server tables. However, the data source is not limited to SQL Server, any data source can be used, as long as the data can be loaded to a DataTable instance or read with a IDataReader instance. From a performance standpoint, SqlBulkCopy makes it very easy and efficient to copy large amounts of data. Loading xml data into sql server table using sqlbulkcopy The following are the steps to achieve this using SqlBulkCopy class Step 1 : Create the database tables using the following sql script Create table Departments ( ID int primary key, Name nvarchar(50), Location nvarchar(50) ) GO Create table Employees ( ID int primary key, Name nvarchar(50), Gender nvarchar(50), DepartmentId int foreign key references Departments(Id) ) GO Step 2 : Create a new empty asp.net web application project. Name it Demo. Step 3 : Add a new xml file to the project. Name it Data.xml. Copy and paste the following XML. [?xml version="1.0" encoding="utf-8" ?] [Data] [Department Id="1"] [Name]IT[/Name] [Location]New York[/Location] [/Department] [Department Id="2"] [Name]HR[/Name] [Location]London[/Location] [/Department] [Department Id="3"] [Name]Payroll[/Name] [Location]Mumbai[/Location] [/Department] [Employee Id="1"] [Name]Mark[/Name] [Gender]Male[/Gender] [DepartmentId]1[/DepartmentId] [/Employee] [Employee Id="2"] [Name]John[/Name] [Gender]Male[/Gender] [DepartmentId]1[/DepartmentId] [/Employee] [Employee Id="3"] [Name]Mary[/Name] [Gender]Female[/Gender] [DepartmentId]2[/DepartmentId] [/Employee] [Employee Id="4"] [Name]Steve[/Name] [Gender]Male[/Gender] [DepartmentId]2[/DepartmentId] [/Employee] [Employee Id="5"] [Name]Ben[/Name] [Gender]Male[/Gender] [DepartmentId]3[/DepartmentId] [/Employee] [/Data] Step 4 : Include the database connection string in web.config file [connectionStrings] [add name="CS" connectionString="server=.;database=Sample;integrated security=true"/] [/connectionStrings] Step 5 : Add a new WebForm to the project. Drag and drop a button control on the webform. Double click the button control to generate the click event handler. Copy and paste the following code in the the click event handler method. string cs = ConfigurationManager.ConnectionStrings["CS"].ConnectionString; using (SqlConnection con = new SqlConnection(cs)) { DataSet ds = new DataSet(); ds.ReadXml(Server.MapPath("~/Data.xml")); DataTable dtDept = ds.Tables["Department"]; DataTable dtEmp = ds.Tables["Employee"]; con.Open(); using
 HD
HD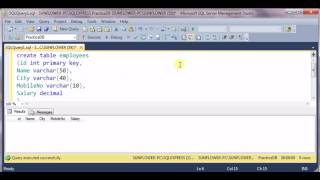

 HD
HD HD
HD HD
HD

 HD
HD HD
HD HD
HD![Web API Tutorial C# [Part 5] - Fetching data from SQL Server into Web API](https://i.ytimg.com/vi/CKldnRS1EfA/mqdefault.jpg) HD
HD HD
HD
 HD
HD HD
HD HD
HD HD
HD HD
HD HD
HD HD
HD
 HD
HD HD
HD HD
HD HD
HD HD
HD HD
HD HD
HD HD
HD HD
HD HD
HD