Arduino 433mhz rf transmitter and receiver module, rf wireless data transfer, rf 433mhz tx and rx HD
Download Circuit diagram and Programming: http://www.electroniclinic.com/arduino-433mhz-rf-transmitter-and-receiver/ Download Libraries: https://www.electroniclinic.com/arduino-libraries-download-and-projects-they-are-used-in-project-codes/ Learn how to make a schematic and PCB: https://youtu.be/pzFj3mx1v78 Pcb design transferring and etching https://youtu.be/g3vFQjwy8h4 Relay driver circuit design calculations https://youtu.be/kXaVMAvHRtE h-bridge simulation https://youtu.be/9TKoUfPbWtg wheelchair project link: https://youtu.be/WNCn062YzXc Amazon Free Unlimited reading and unlimited listening on any device. sign up for a free account and have access to thousands of Programming and hardware designing books. https://amzn.to/2LWmxOg **************************** Amazon Ebooks: Download amazing electronics related ebooks and develop your designing and programming skills. you can download by clicking on the link below: https://amzn.to/2u1yNTB **************************** free Amazon Business Account: Sign up for Amazon Business account started on 1 august 2018. https://amzn.to/2MiPiBT ***************************** Project Description: ***************************** In today’s episode, you will learn how to make your own wireless remote control system using 433Mhz rf transmitter and receiver modules. This episode covers all the basics, Transmitter and receiver module pinouts, Interfacing, H-bridge explanation and soldering, programming, and how to make a remote controller to control an H-bridge. As you know H-bridges are most commonly used in robotics for controlling the robots forward, left and right movements. Well, in fact, this remote controller can be used to control anything wirelessly. Let’s get started…. The components that we will be needing are 1. Arduino, we will need two of these, one will be used with the transmitter module and the other one will be used with the receiver module. 2. A Vero board for fixing the Push buttons, a transmitter module, and Arduino, we will make four holes for the push buttons. 3. Push buttons; we will need 4 of these, for the forward..right..left and stop. 4. 433Mhz rf transmitter and receiver modules. And finally number 5. Some male to female type jumper wires ***************************** Purchase links for Components with the best prices. Arduino uno: https://amzn.to/2tVz1vu Push Buttons: https://amzn.to/2PELyvk 433Mhz tx and rx: best offer https://amzn.to/2EkVMyN 12v SPDT relays: https://amzn.to/2EoBnZT 2n2222 npn transistors: https://amzn.to/2EmXsIb Mega 2560: https://amzn.to/2ze1kdu Super Starter kit for Beginners https://amzn.to/2KJvmKG Jumper Wires: https://amzn.to/2KMoVXs Bread Board: https://amzn.to/2MS4q8X 12v Adaptor: https://amzn.to/2Ntr6h1 PCB plate: https://amzn.to/2IUwpCt Variable Supply: https://amzn.to/2MT4Qfj Digital Multimeter: https://amzn.to/2Nvft9i
 HD
HD HD
HD HD
HD HD
HD HD
HD HD
HD HD
HD HD
HD HD
HD HD
HD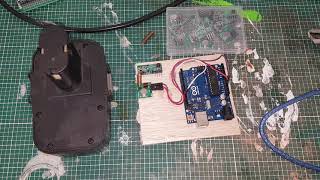 HD
HD HD
HD HD
HD HD
HD HD
HD HD
HD HD
HD HD
HD HD
HD HD
HD HD
HD HD
HD HD
HD HD
HD HD
HD HD
HD HD
HD HD
HD HD
HD HD
HD HD
HD HD
HD