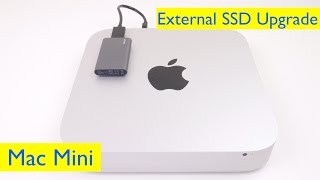
Mac Mini Upgrade SSD - External SSD Upgrade for Final Cut Pro X HD
Mac Mini Upgrade SSD - External SSD Upgrade for Final Cut Pro X PNY Elite Portable SSD: http://amzn.to/2ehfz5g Sandisk Extreme 500 SSD: http://amzn.to/2dy6jpr Samsung T3 Portable SSD: http://amzn.to/2dJHKcw Sabrent USB hub : http://amzn.to/2eEKjv7 Today’s video is for folks who have a Mac, like a Mac mini, and want a faster hard drive for better performance. You could always replace the internal hard drive with an SSD, but that’s a pretty complicated job. For those of you who don’t want to use this technique, here’s a simple way to improve your computer’s performance using an external SSD. And this improves your performance a lot, when it comes to things like video editing. I’ll be using a PNY Elite Portable SSD today, but you can use any portable SSD you’d like. I’ll leave links to some portable SSD’s that’ll work well for this upgrade, right below this video. The process is pretty much the same whether you have a Mac Mini, iMac or even a MacBook. And it’s probably very helpful for folks who plan to use their Macs for Final Cut Pro. So let’s get started. The first step is pretty simple. Plug the SSD into any USB port on your computer. You’re going to have to leave the drive plugged in permanently, so make sure you’re not going to need that USB port. Now in case you need more USB ports you could always use a powered usb hub like this one. And i’ll leave a link to that below. Once the SSD turns on and is recognized by your mac, you’re going to need to format it. Formatting it removes any data on the drive and ensures that the drive works efficiently with your Mac. Now if there are any files on this SSD that you need, make sure to transfer them before you format it. To format it, click on launchpad, then click on the icon called “other” and then click on Disk Utility. Once that opens up, click on your SSD, which in my case is “PNY Elite” and then click on the Erase button on top. Now you might wanna give the SSD a new name. I’ll call mine PNY Elite FCP, because I am going to be using it mostly with Final Cut Pro. Then click the drop down menu next to the word Format and select the OS X Extended (Journaled) format. And then click Erase and wait for it to finish formatting. Once it finishes formatting, it might ask if you’d like to use it with Time Machine. Click dont use. Now most people are going to want to do this upgrade to ensure Final Cut pro runs faster. And in order to do this, I am first going to create a dedicated folder on my SSD for Final Cut. Double Click on the SSD which is visible on your desktop. Right click in the white space when it opens up and then select “New Folder”. I am going to call my new folder “Final Cut New Library”. And I am going to ensure that all my Final Cut Events, Media and Final videos are all stored in this folder. Storing your entire library on the SSD, helps Final Cut run much faster especially, if you have limited RAM, a base processor and a mechanical hard drive, like the one on this Mac Mini that I’m usi
 HD
HD HD
HD HD
HD HD
HD HD
HD HD
HD HD
HD HD
HD
 HD
HD HD
HD HD
HD HD
HD
 HD
HD HD
HD HD
HD HD
HD HD
HD HD
HD HD
HD HD
HD HD
HD HD
HD HD
HD HD
HD HD
HD HD
HD HD
HD HD
HD HD
HD HD
HD