Sony Xperia XA1 Plus LCD Screen Repair Guide HD
In this video, i will show you how to replacement lcd screen for sony xperia xa1 plus. Get Original LCD Screen for Sony Xperia XA1 Plus at: https://www.witrigs.com/oem-lcd-screen-with-digitizer-for-sony-xperia-xa1-plus-blue Get Original Replacement Part for Sony Xperia XA1 Plus at: https://www.witrigs.com/replacement-parts-for-sony-xperia-xa1-plus Get LCD Screen Frame Adhesive for Sony Xperia XA1 Plus at: https://www.witrigs.com/witrigs-lcd-supporting-frame-sticker-for-sony-xperia-xa1-plus Get Back Cover Adhesive for Sony Xperia XA1 Plus at: https://www.witrigs.com/witrigs-back-cover-sticker-for-sony-xperia-xa1-plus Why need to repair LCD Screen? The LCD Screen may black screen or broken after a long time of using. This video teaches you how to replace and repair the damaged lcd screen of your Sony xperia xa1 plus. It solves problems like screen no display, black screen, white line on the screen or screen broken. We will upload other repair guide of Sony xperia xa1 plus as soon as possible. Tell us which part of xperia xa1 plus you want to repair at comments section. Witrigs offers not only mobile repair tutorial including disassembly, assembly, and components replacement guide, but also phone accessories review video on YouTube. Publisher: Witrigs - http://www.witrigs.com/ Witrigs YouTube Channel - https://www.youtube.com/user/witrigs If you are interested in DIY phone repair or latest phone accessories review, Like Us on Facebook Page: https://facebook.com/witrigsphonerepair Subscribe Us on YouTube: https://www.youtube.com/user/witrigs Follow Us on Twitter: https://twitter.com/witrigs Add Us on Google+: https://plus.google.com/+Witrigs-com Subscribe Us on Blog: http://www.witrigs.com/blog/ Don’t forget to Like if this video helps you. And don’t forget to SUBSCRIBE! Music name: Touch the Sky - Yung Sir Tools: 1. Spudger - http://www.witrigs.com/case-opening-tool-02-for-iphone 2. Hair Dryer or Heat Gun - http://www.witrigs.com/best-electronic-heat-gun-blue 3. Card - http://www.witrigs.com/plastic-opening-card 4. Suction Cup - https://www.witrigs.com/super-tpu-suction-cup-transparent 5. Tweezers - https://www.witrigs.com/pro-rhino-tweezers-ts-7a-no-magnetic-black-for-ipod 6. PH#000 Screwdriver - https://www.witrigs.com/witrigs-phillips-screwdriver-ph000-1-5-25mm-purple 7. T4 Torx Screwdriver - https://www.witrigs.com/hexagonal-screw-driver 8. Steel Tweezers - https://www.witrigs.com/pro-rhino-tweezers-ts-00-no-magnetic-for-ipod 9. Ultra-thin Opening Card - https://www.witrigs.com/ultra-thin-opening-card-20pcs-set-blue Steps: Step 1 Power off Step 2 Remove the Back Cover Step 3 Disconnect the Battery Flex Cable Step 4 Remove the Charging Port Step 5 Remove the Battery Step 6 Remove the Signal Cable Step 7 Remove the Side Strip Step 8 Remove the LCD Screen Step 9 Test the New LCD Screen Step 10 Install the New LCD Screen Step 11 Put back the Other Parts Recommended video: Sony Xperia XA1 Plus Durability Test: https://www.y
Похожие видео
 HD
HD HD
HD HD
HD HD
HD HD
HD HD
HD HD
HD HD
HD HD
HD HD
HD
 HD
HD
 HD
HD HD
HD HD
HD HD
HD HD
HD HD
HD HD
HD HD
HD
 HD
HD HD
HD HD
HD HD
HD HD
HD HD
HD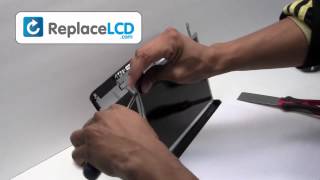 HD
HD HD
HD HD
HD HD
HDПоказать еще