Inateck 4-Port USB 3.0 PCIe Card (KT4005) | HD HD
http://www.amazon.co.uk/Cord-free-Expansion-Controller-Additional-Connection/dp/B00JEVLCZI/ref=sr_1_13?ie=UTF8&qid=1408570159&sr=8-13&keywords=inateck+usb+3.0 Basic Script: Hello YouTube. Today I have an unboxing, installation tutorial and review for you of the 4-port USB 3.0 PCI-E Card from Inateck. This card is designed for people who have a desktop PC and wish to add or expand their number of USB 3.0 ports. You will require a free PCI-E slot to install the device which is capable of Super-speed USB data transfer rates of up to 5 giga bits per second. Importantly for anyone looking to buy this device is that it is backward compatible with all other USB devices and another nice feature is that it doesn’t require any additional power connections. So let’s get this box open by removing the shrink wrap like so. Then we have a frustration free unboxing by simply lifting the flap. Firstly we have the card itself in an anti static bag, which we’ll take a look at in a second. Next we have some product return information if we have any faults with our product followed by a detailed instruction manual which will get you sorted in terms of fitting the card and installing the necessary drivers. Finally we have the drivers on an installation CD. Now let’s take a look at the product itself after we remove it from it’s anti-static bag. We can see the board has been well made and looks neat, which is a good sign. We can see the mounting bracket with four USB 3.0 ports on the back which is what you’ll be able to view from the exterior of the case. At 90 degrees to this we have the PCI-e x1 pins which are going to plug into our Motherboard. On first impressions I’m impressed, so lets get this card installed in a PC. Once I have safely turned my computer off and removed the side panel of my case, we can see the motherboard. Here is a PCI-e x1 slot which I have already taken up using my wireless card and below it we can see the longer PCI-e x16 slot which I’m going to use to install the USB 3.0 card. It can be done in either slot, whichever you have free. The next step is to remove the back plate that lines up with the slot you are going to use. I have a simple metal case so to remove the plate we just have to give it a bend until it snaps off. Next we need to look at the pins on the card and see the shape of them as we need to line them up with the slot like so and gently push it in. We can see the card’s weight is on the slot so to prevent it from damaging our motherboard we simple need to inset one of the provided screws like so. It’s a bit of a fiddle, depending on your case, but can be done. Now we can turn the computer back on. You’re going to need a disk drive for this step to insert the driver CD which is relatively easy, but I’ll quickly go through it. Remember that this is for windows only. Once you’ve inserted the disk, launch the auto set-up, then once the inateck menu loads, click the ‘Drivers’ link. I have a green card so I’m going to click the Gre
 HD
HD
 HD
HD HD
HD HD
HD HD
HD HD
HD HD
HD
 HD
HD HD
HD HD
HD HD
HD HD
HD HD
HD HD
HD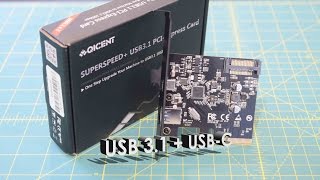 HD
HD HD
HD HD
HD HD
HD HD
HD
 HD
HD HD
HD HD
HD HD
HD HD
HD HD
HD HD
HD HD
HD HD
HD